Saturday, September 23, 2006

Skin Care: Applying Masks ~ By Theresa Pittman


How to Apply a Mask

This outlines the ideal process for applying a mask. Unfortunately, many of us lead such busy lives that we find it difficult to devote this much time to ourselves. Aim to find that time at least once a week. If you still don't have that much time, use the steps that you can.

1. Find a quiet, calm time and place. When you allow yourself the space to slow down and enjoy the simple processes of preparing, applying, and removing a mask, you are likely to be more centered, and that means more receptive and responsive.

2. Put on a headband to protect your hair, and remove any makeup. Then carefully clean the skin with cotton pads and bottled or spring water, an herbal infusion, or a hydrosol.

3. Relax your facial muscles in any way that suits you. It might be by using massage or by making hideous faces at yourself in the mirror.

4. Steam your face gently or apply a hot compress for 2 minutes. Both techniques open the pores so that the mask can penetrate more deeply. **Note** Steaming should not be used more often than monthly for dry or mature skin. It is not recommended at all for sensitive or damaged skin. Oily skin can benefit from weekly steaming, and normal skin should use this technique every other week.

5. Apply the mask evenly, avoiding the area around the eyes, using your fingers or cotton pads as appropriate.

6. Try not to talk, laugh, or move any facial muscles until it is time to remove the mask. Take this time to relax.

7. Remove the mask slowly and carefully. Work from the forehead downward, making sure that none of the material removed comes into contact with the eyes, and avoid dragging the skin. Light fruit masks can be removed with cotton pads. Clay masks will need to be softened with water before removing. Rinse face with tepid water to be sure all of the mask material is removed.

8. Apply hydrosol or toner to close the pores and tone the skin.

Apricot Facial Mask

1/2 cup dried apricots
1/2 cup warm water
1 tablespoon dry milk powder
1 tablespoon honey

Place all ingredients in a blender and blend until smooth. Spread on your face and leave on for 15 minutes. Rinse off with tepid water and pat dry.

If your complexion has become colorless and dull, this mask can be used to revitalize it. Apricots are rich in vitamin A, which is important for healthy skin. Combined with milk and honey, they return moisture to the skin, helping it to look and feel smoother and softer.

Strawberry Acne Mask

1/2 cup fresh strawberries (you can use frozen if fresh are not available, be sure there is no added sugar)
1 egg white
2 tablespoons honey

Mix together all ingredients until smooth, using a blender or fork. Spread over your face and neck and leave on for 20 minutes. Rinse with cool water and pat dry

Strawberries are rich in salicylic acid, the same key ingredient in many commercial acne products; honey is also a known antibacterial ingredient. Together they make a powerful facial treatment for troubled skin.

Old-Fashioned Oatmeal Masks

Oatmeal comforts and nourishes the skin - it is rich in protein, potassium, iron, phosphates, magnesium, and silicon. It is perfect for individuals with sensitive skin because it is naturally gentle and mild. The three masks that follow offer an oatmeal mask for all skin types.

For Oily Skin

1/2 cup cooked oatmeal
1 egg white
1 tablespoon fresh lemon juice
1/2 cup mashed apple

For Dry Skin

1/2 cup cooked oatmeal
1 egg yolk
1/2 banana, mashed
1 tablespoon honey

For Normal Skin

1/2 cup cooked oatmeal
1 whole egg
1 tablespoon almond oil or other light vegetable oil

Mix or blend all ingredients together into a smooth paste. Spread on your face and leave for 15 minutes. Rinse your face with tepid water and pat dry.


Nature's Treasures djdoodle Merchant Shoppe

Nature's Treasures Blog

Nature's Treasures Craft Booth 256
No comments:


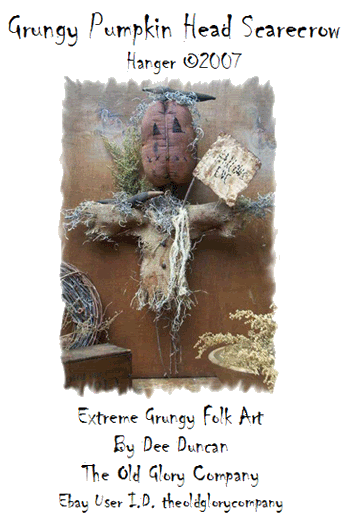
The Old Glory Company would like to share this free pattern with our readers. Please visit their site for more wonderful grungy patterns. They are also having a Trick or Treat Giveaway going on and have new Fall Patterns available.
To access the Grungy Pumpkin Head Scarecrow click on this link.

The Grubby Doll Look

The Grubby Doll Look


“Grubby” is the word I kept hearing around the craft circuit. To me grubby meant grimy. So I decided to get to the bottom of this and find out the big deal with grubbing a doll and what it really meant in crafters terms. So I decided to ask a fellow crafter “What Is Grubby? To my surprise I found out that it’s another word for aged or old and that it gives your dolls that dirty look. Now at first I thought to myself “Why would I want to make my dolls look dirty”. Then I did a few of my dolls and realized they are not really dirty looking but a bit more primitive.


So to get “The Grubby Doll Look”, you can use a tea mixture, coffee or Walnut Ink. I decided to go with Walnut Ink, since I seem to drink too much coffee or tea to keep any left over for my dolls.


Where do you purchase Walnut Ink? Try various craft sites and also E-bay sells them. Now this does not mean to go out and make all your dolls look grubby, has you may or may not like the look. Trust me; I was skeptical in the beginning so it’s best to start out with 1-2 dolls at a time.


Once you have grubbed up a few dolls, try selling them at your next craft show. This is a great way to introduce a new doll to your customers and also find out if they are acceptable. It is always good to test your market before going overboard with a new product.


Now of course I don’t listen to my own advice and have done well with making these sort of dolls. I even sold a few on Ebay. So if you decide to jump in and just go nuts with making grubby dolls, remember I warned you.


Also know that each target market area is different and some people may not know what grubby is so be prepared to answer the question “What is Grubby”.


Author: Talena Bacon tdsewcutedoll@gmail.com


Bio: © 2008 –All Rights Reserved~~~Talena Bacon is the owner of Sew Cute Dolls & More and Mulberry Creek Mercantile She is a doll maker, pattern designer and advertising specialist. Talena specializes in Primitive/Country dolls, home décor and low-cost advertising for all businesses. http://www.sewcutedolls.com http://www.mulberrycreekmercantile.com


You have permission to publish this article electronically, in print, your e-books or on your web site, free of charge, as long as the author byline above is included. Copy and Paste the article including authors byline to use this article.


Digi Scrap Kits - Trina Clark Designs!


Primitive Country Clipart, MySpace Layouts, Printables (labels, hang tags, & gift tags), Digi Scrapbook Papers/Kits, & More - All for Immediate Download! Use my primitive country graphics to create many different types of crafts, web graphics or desktop publishing projects for personal and commercial use - all without any extra commercial fees!
Go Shopping Now!

Linda's E-Books

I get asked a LOT - "How do you design a doll e-pattern?" So, a few months ago I wrote a FREE 4-part series of articles on "How to Create A Print Pattern and E-Pattern" and thought that maybe all of you might like it if I created a FREE .PDF E-Book from that series of articles. So, I did. Now everyone who wants to try and design their own doll or craft patterns or e-patterns can find out how to do it. I hope you enjoy my FREE Linda's How-Do-I Series? How To Create A Print Pattern and E-Pattern E-Book and hope it motivates you to create your own e-patterns. Linda

Old Fashioned Rag Balls

by Mary Roberson

Ragballs are fun and easy to make! They look great displayed in Mason Jars or in Baskets, Bowls and Small Buckets. Add them inside a Glass Mason Jar Lamp instead of Rosehips, or in addition to your Fixins, for a unique twist!

Click here for directions on making Old Fashion Rag Balls.